Recording FaceTime chats with audio can help you save memories, interviews, and even key meetings. Whether you’re using an iPhone, iPad, or Mac, there are various ways to capture these moments while retaining the core of the conversation. This article walks you through the numerous ways to record FaceTime chats with audio on multiple devices.
What is Record Facetime With Audio?
Recording FaceTime with audio is the method of capturing both the video and audio of a FaceTime call. This means you save a video recording of your chat, including everything you see and hear during the call, to watch or listen to later. It’s similar to making a video recording of your screen while on a FaceTime conversation, but with the added benefit of capturing the voices and any other noises throughout the call.
How To Record Facetime With Audio: iPhone/Mac
Recording on iPhone: Step by Step
- Getting Ready: First thing, you need to add ‘Screen Recording’ to your Control Center if it’s not already there. Go to ‘Settings’ > ‘Control Center’ > ‘Customize Controls’, then tap the ‘+’ next to ‘Screen Recording’.
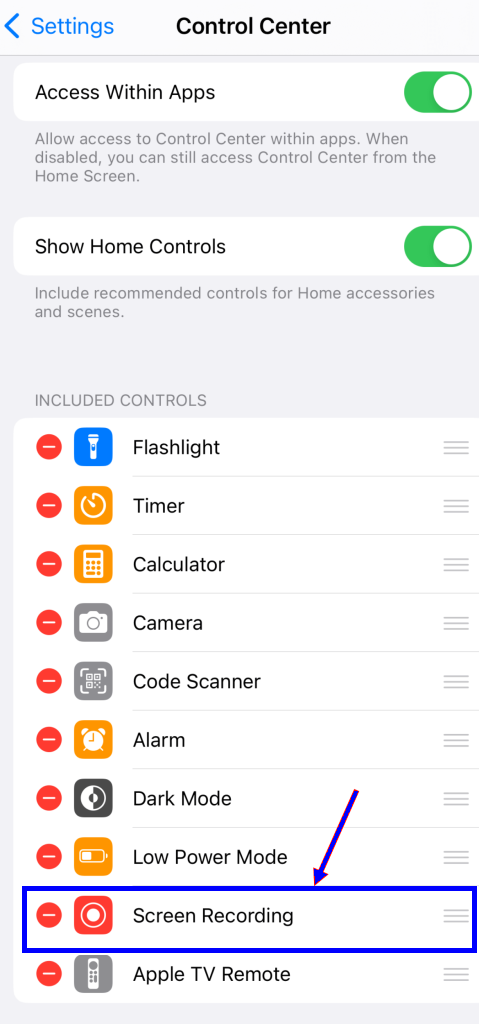
- Let’s Record: Swipe to open Control Center, press the record button (it looks like a circle), and then wait for the three-second countdown. Go ahead and start your FaceTime call. Remember, to capture audio, press deeply on the record button and choose ‘Microphone On’.
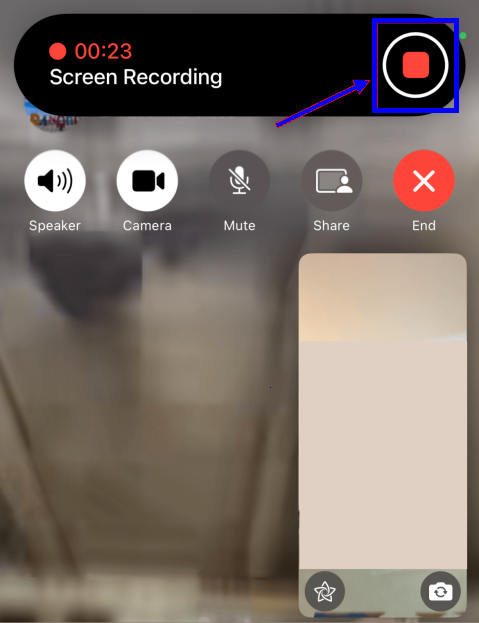
- Saving Your Memories: Once your call is done, go back to Control Center and press the record button again to stop recording. Your video will be saved in the Photos app.
Recording on Mac: A Little Different
If you got a Mac, you can use it to record FaceTime calls from your iPhone with audio. Here’s how:
- Connect Your iPhone to Mac: Use a cable to connect your iPhone to your Mac. If it asks, tap ‘Trust’ on your iPhone.
- QuickTime Player is Your Friend: Open QuickTime Player on your Mac. You can find it in the Applications folder.
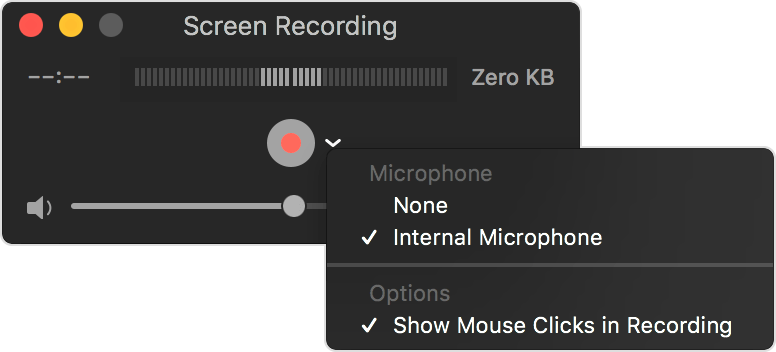
- New Movie Recording: In QuickTime Player, click ‘File’ > ‘New Movie Recording’. Then, click the tiny arrow next to the record button and select your iPhone for the camera and the internal microphone for the mic.
- Recording Time: Hit the record button in QuickTime Player, then start your FaceTime call on your iPhone. Be careful not to disconnect your iPhone!
- Save the Call: After the call, stop the recording in QuickTime Player and save your file.
Recording Directly on Mac
Got a Mac and want to record a FaceTime call directly? Easy peasy:
- Shortcut Magic: On macOS Mojave or later, press ‘Command + Shift + 5’ to open the screen recording toolbar.
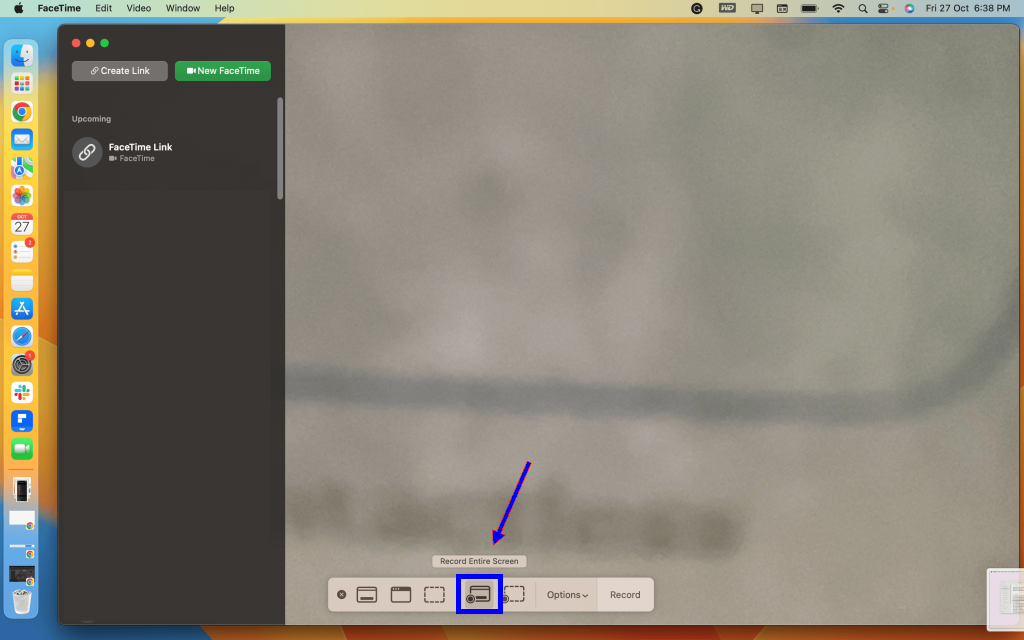
- Record Your Call: Choose to record the entire screen or just a portion. Make sure to select ‘Built-in Microphone’ under Options for audio.
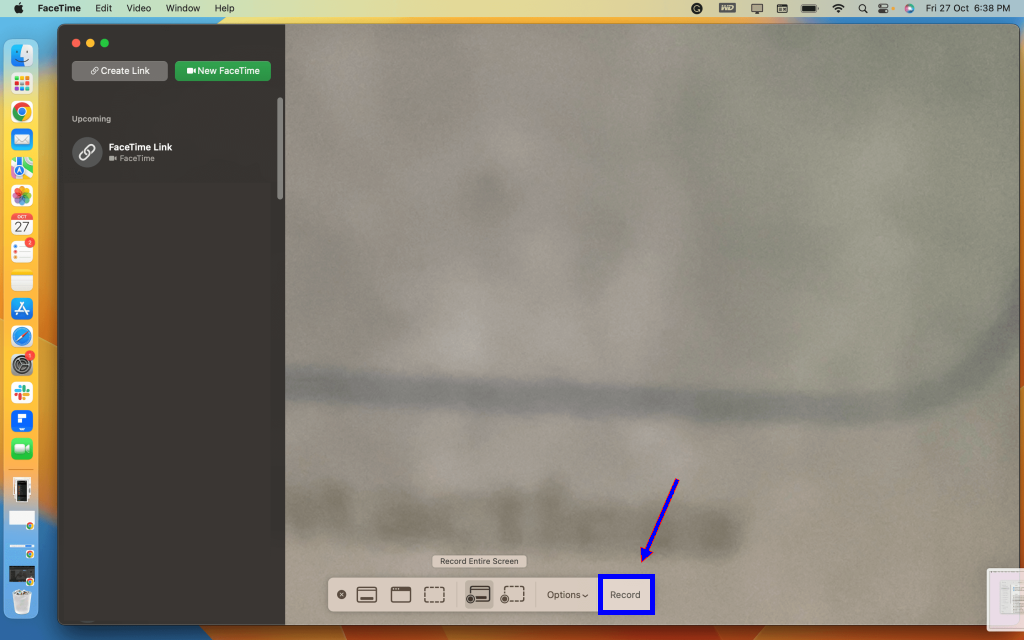
- Finish and Save: Start your FaceTime call. When done, click the stop button in the toolbar to save the recording.
Best Online Screen Recorder: www.notta.ai
the steps to record FaceTime calls with audio using Notta:
- Start a FaceTime call and sign up for a free trial at Notta.
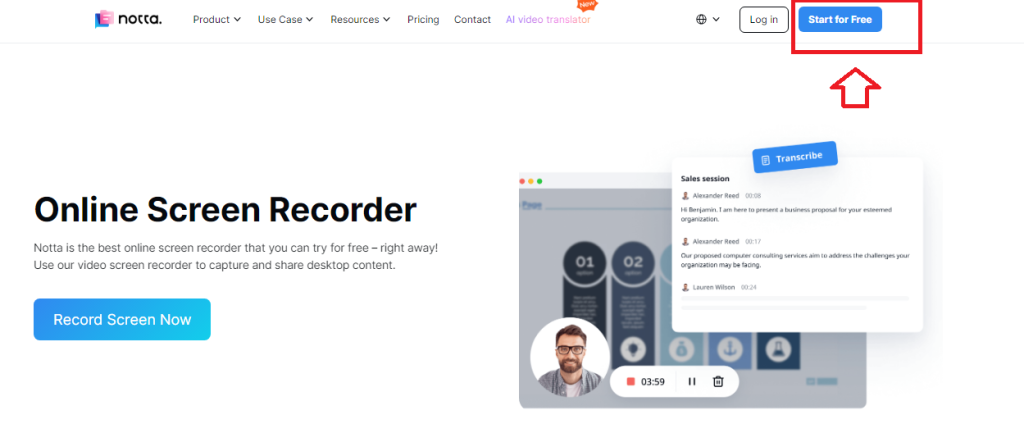
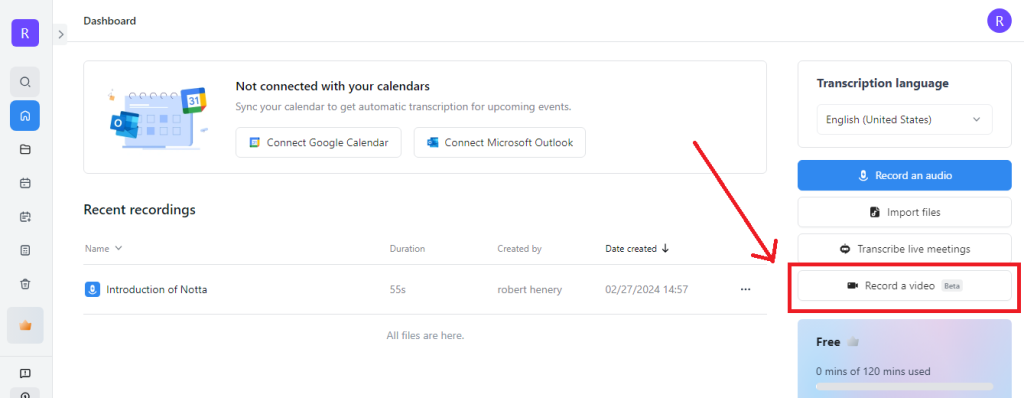
- On the Notta dashboard, select “Record a Video” from the right sidebar.
- Choose one of the recording options Screen Only, Camera Only, or Screen & Camera.
- Click ‘Start Recording’ and select ‘FaceTime’ to begin recording both audio and video.
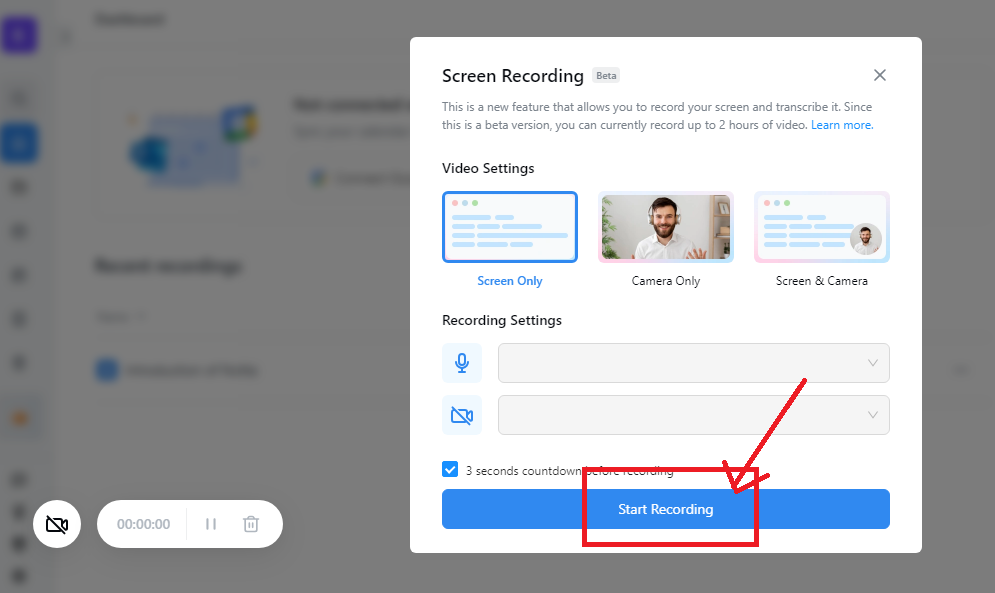
- End the recording by clicking on the red button after your call.
- Access your recorded and transcribed call in the Notta dashboard by clicking on the file.
Easy Tips Record FaceTime on Android Devices
Recording FaceTime calls on Android devices requires some imagination because FaceTime is only available on Apple devices. You can, however, record video calls made using other programs that work on both Android and iOS devices. Here are a few tips:
- Use Alternative Apps: For video calls, use apps that function on both Android and iOS, such as Skype, WhatsApp, or Zoom.
- Enable Screen Recording: Before beginning the call, turn on the screen recording capability on your Android device. This is normally located in the Quick Settings panel. If your device does not have a built in recorder, you can download a screen recording app from the Google Play Store.
- Start Recording: Swipe down to reach Quick Settings, then hit the screen recorder icon to begin recording before making the call.
- Make the Call: Use the app you’ve chosen to make your video call. The screen recorder will record both the video and audio from the call.
- End and Save: When your call is ended, stop recording. The video file will be saved to your device’s gallery or within the app you used to capture.
- Check sounds Settings: Ensure that the screen recorder is set to record sounds. Some programs may require you to turn on the microphone manually.
Final Thoughts
While recording FaceTime calls with audio on Apple devices is very simple, users frequently face issues, particularly in terms of audio fidelity and legal considerations. Whether you utilize your device’s built-in functions or third party apps and software, good audio and consent are essential. With the methods described above, capturing those key moments over FaceTime is easier than ever.
Important FAQs
Q1. Can I record a FaceTime call with audio?
Ans: Yes, you can record a FaceTime call with audio on your iPhone or Mac, but you may need to adjust settings or use third party apps to include audio.
Q2. Why is there no sound when I screen record FaceTime?
Ans: If there’s no sound during a FaceTime screen recording, it’s likely because the microphone isn’t enabled in the settings.
Q3. Is there a record of FaceTime audio calls?
Ans: Apple does not offer a direct option to record FaceTime audio calls for privacy concerns, so you must use alternative recording solutions.
Q4. How do I record a video call with sound on my iPhone?
Ans: To record a video call with sound on your iPhone, utilize the built in screen recording capability. Make sure the microphone is enabled.
Q5. How to Record FaceTime Call with Sound iOS & Mac?
Ans: On iOS, utilize the screen recording capability with the microphone switched on. On Mac, use QuickTime Player or the Screenshot Toolbar to capture video and audio.
Q6. Why can’t I screen record FaceTime with audio?
Ans: If you’re having trouble recording audio during FaceTime, it’s possible that the microphone isn’t enabled in your screen recording options.
Q7. Can You Record FaceTime Calls?
Ans: When recording FaceTime calls, it’s important to obtain agreement from all individuals involved for legal and privacy reasons.
Q8. How to Screen Record FaceTime Calls Easily?
Ans: To record, utilize the built in screen recording function on your iOS device and enable the microphone for audio. Alternatively, QuickTime on a Mac allows for easy recording.
Q9. How to Record FaceTime with Audio?
Ans: On iPhone and iPad, enable screen recording from the Control Center and make sure the microphone is on; on Mac, use QuickTime or the screenshot toolbar for recording.
